Chimney Cake Recipe - Taste Just Home
Hey there, fellow food enthusiasts! Today, I am beyond excited to share with you one of my all-time favorite recipes - the heavenly "Chimney Cake".

This delectable treat has always held a special place in my heart, thanks to its unique preparation and unforgettable flavor profile.
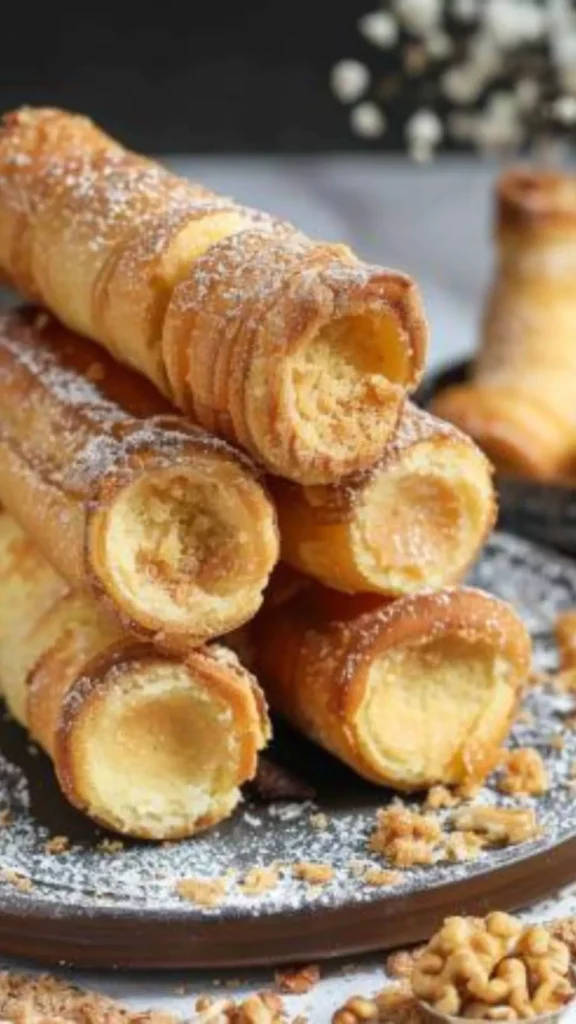
With its lightly crisp exterior and soft, pillowy interior, chimney cake is the kind of dessert that feels both nostalgic and indulgent, making it a wonderful choice for celebrations, gatherings, or a simple sweet craving.
From the buttery, yeast-based dough to the warm aroma of caramelized sugar and cinnamon, every bite offers a perfect contrast of textures and flavors.
Finished with fragrant toppings that cling to the golden crust, this dessert delivers a comforting sweetness that's rich without being overwhelming-a true taste of bliss that keeps you coming back for more.
You will also like the following Dessert recipes!
Ingredients
For the Dough:
- Lukewarm milk: Lukewarm milk serves as the liquid base for the dough, hydrating the flour and activating the yeast. It also adds richness and a subtle sweetness to the dough, contributing to its tender texture and flavor.
- Plain all-purpose flour: All-purpose flour provides the structure and bulk of the dough. Its gluten content helps to give the chimney cake its characteristic chewy texture while also allowing it to rise properly during baking.
- Instant dry yeast: Yeast is responsible for leavening the dough, causing it to rise and become airy and light. Instant dry yeast activates quickly and requires no proofing, making it convenient for use in this recipe.
- Large eggs: Eggs add richness, flavor, and color to the dough. They also act as a binding agent, helping to hold the ingredients together and creating a smooth, cohesive dough.
- Granulated sugar: Sugar sweetens the dough, providing a hint of sweetness that balances the flavors of the other ingredients. It also helps to activate the yeast and promote browning during baking.
- Unsalted butter: Butter adds richness and a buttery flavor to the dough, contributing to its tender texture and enhancing its overall taste. It also helps to keep the dough moist and supple.
- Vanilla extract: Vanilla extract enhances the flavor of the dough, adding a subtle hint of vanilla that complements the sweetness of the sugar. It adds depth and complexity to the overall flavor profile of the chimney cake.
- Salt: Salt enhances the flavor of the dough, balancing the sweetness of the sugar and enhancing the other flavors. It also helps to strengthen the gluten structure of the dough, improving its texture and elasticity.
For the Topping:
- Egg and milk for brushing: The egg and milk mixture is brushed onto the dough before baking to give the chimney cake its golden brown color and glossy finish. It also helps the toppings adhere to the surface of the cake.
- Ground cinnamon and granulated sugar: This mixture is sprinkled over the brushed dough, adding a sweet and spicy flavor that complements the richness of the cake. It forms a crispy, caramelized crust during baking, adding texture and depth of flavor.
- Ground walnuts: Ground walnuts provide a nutty flavor and crunchy texture to the chimney cake. They add richness and depth to the overall taste profile, as well as visual interest.
Step-by-Step Directions
Step 1: Preparing the Yeast Mixture
Let's start by activating the yeast. Take a small bowl and pour in the lukewarm milk, along with 2 tablespoons of sugar and the instant dry yeast. Give it a good mix and then set it aside for about 5-10 minutes. You'll know it's ready when it becomes frothy or bubbly.
Step 2: Mixing the Wet Ingredients
In a separate large bowl, combine the softened unsalted butter, eggs, remaining sugar, salt, and vanilla extract if you're using it. Use a wooden spoon or spatula to mix everything together until it's well combined.
Step 3: Forming and Kneading the Dough
Slowly add the plain all-purpose flour into the wet mixture, stirring as you go, until a dough starts to form. If you have a stand mixer, you can use the dough attachment to knead the dough for about 4-5 minutes. If you're kneading by hand, lightly flour your work surface and knead the dough for around 7-10 minutes, until it's smooth and no longer sticky.
Step 4: Proofing the Dough
Take a large bowl and grease it with some vegetable oil. Place the kneaded dough into the bowl, then cover it with either plastic wrap or a damp kitchen towel. Let the dough proof in a warm place for at least 30-45 minutes, or until it doubles in size.
Step 5: Rolling and Shaping the Dough
Once the dough has proofed, roll it out onto a clean surface into a rectangle shape, making sure it's about 1.5 inches thick. Use a pizza cutter to divide the dough into 4 equal strips.
Step 6: Shaping the Dough into Coils
Working with one strip at a time, roll it into a long coil about 1 inch thick and 20-25 inches in length. Repeat this process for the remaining strips of dough.
Step 7: Wrapping the Dough Around the Rolling Pins
Cover each wooden rolling pin with aluminum foil to prevent the dough from sticking. Carefully wrap each dough coil around a rolling pin, making sure there's no overlapping of the dough.
Step 8: Preheating the Oven and Applying Egg Wash
Preheat your oven to 350°F (180°C). In a small bowl, whisk together 1 egg and 1 tablespoon of milk to create an egg wash. Use a pastry brush to coat each chimney cake with the egg wash.
Step 9: Preparing and Applying the Topping
For the topping, mix together the ground walnuts, granulated sugar, and ground cinnamon on a tray or large plate. Roll each chimney cake in the topping mixture, gently pressing to ensure it's coated evenly on all sides.
Step 10: Baking the Chimney Cakes
Place the rolling pins with the chimney cakes onto a deeper tray, ensuring the handles rest on the edges of the tray to prevent the cakes from touching the bottom. Bake for 10 minutes, then rotate the rolling pins and bake for another 10-15 minutes or until they're golden brown.
Step 11: Serving the Chimney Cakes
Once they're baked to perfection, carefully slide the chimney cakes off the rolling pins and onto a serving plate. Serve them up while they're still warm and enjoy the sweet, crunchy goodness of your homemade treats!

Recipe Notes
- Lukewarm milk is essential for activating the yeast and aiding in the dough's rising process.
- Room temperature eggs are easier to incorporate into the dough, ensuring a smoother texture.
- Softened butter blends seamlessly into the dough, adding richness and moisture.
- Vanilla extract is optional but enhances the overall flavor profile of the Chimney Cake.
- Ground walnuts can be substituted with other nuts or omitted for nut-free variations.
Recipe Variations
- Chocolate Lovers Twist: Incorporate cocoa powder into the dough and add chocolate chips to the topping for a decadent chocolate Chimney Cake.
- Fruity Delight: Mix dried fruits like raisins or cranberries into the dough and top with a drizzle of honey before serving for a sweet and tangy variation.
- Savory Surprise: Add herbs and spices like rosemary or garlic powder to the dough and top with grated cheese for a unique savory twist on the classic Chimney Cake.


Chimney Cake Recipe

Equipment
- oven
- plastic wrap
Ingredients
For the dough
- ⅓ cup of lukewarm milk
- 3 ¼ cups of plain all-purpose flour
- 1 ½ teaspoons of instant dry yeast
- 2 large eggs at room temperature
- ¼ cup of granulated sugar
- ¼ cup of unsalted butter softened
- 1 teaspoon of vanilla extract optional
- ¼ teaspoon of salt
For topping:
- 1 egg for brushing
- 1 tablespoon of milk for brushing
- 2 teaspoons of ground cinnamon
- 1 cup of granulated sugar
- ½ cup of ground walnuts
Instructions
Step 1: Preparing the Yeast Mixture
- Let's start by activating the yeast. Take a small bowl and pour in the lukewarm milk, along with 2 tablespoons of sugar and the instant dry yeast. Give it a good mix and then set it aside for about 5-10 minutes. You'll know it's ready when it becomes frothy or bubbly.
Step 2: Mixing the Wet Ingredients
- In a separate large bowl, combine the softened unsalted butter, eggs, remaining sugar, salt, and vanilla extract if you're using it. Use a wooden spoon or spatula to mix everything together until it's well combined.
Step 3: Forming and Kneading the Dough
- Slowly add the plain all-purpose flour into the wet mixture, stirring as you go, until a dough starts to form. If you have a stand mixer, you can use the dough attachment to knead the dough for about 4-5 minutes. If you're kneading by hand, lightly flour your work surface and knead the dough for around 7-10 minutes, until it's smooth and no longer sticky.
Step 4: Proofing the Dough
- Take a large bowl and grease it with some vegetable oil. Place the kneaded dough into the bowl, then cover it with either plastic wrap or a damp kitchen towel. Let the dough proof in a warm place for at least 30-45 minutes, or until it doubles in size.
Step 5: Rolling and Shaping the Dough
- Once the dough has proofed, roll it out onto a clean surface into a rectangle shape, making sure it's about 1.5 inches thick. Use a pizza cutter to divide the dough into 4 equal strips.
Step 6: Shaping the Dough into Coils
- Working with one strip at a time, roll it into a long coil about 1 inch thick and 20-25 inches in length. Repeat this process for the remaining strips of dough.
Step 7: Wrapping the Dough Around the Rolling Pins
- Cover each wooden rolling pin with aluminum foil to prevent the dough from sticking. Carefully wrap each dough coil around a rolling pin, making sure there's no overlapping of the dough.
Step 8: Preheating the Oven and Applying Egg Wash
- Preheat your oven to 350°F (180°C). In a small bowl, whisk together 1 egg and 1 tablespoon of milk to create an egg wash. Use a pastry brush to coat each chimney cake with the egg wash.
Step 9: Preparing and Applying the Topping
- For the topping, mix together the ground walnuts, granulated sugar, and ground cinnamon on a tray or large plate. Roll each chimney cake in the topping mixture, gently pressing to ensure it's coated evenly on all sides.
Step 10: Baking the Chimney Cakes
- Place the rolling pins with the chimney cakes onto a deeper tray, ensuring the handles rest on the edges of the tray to prevent the cakes from touching the bottom. Bake for 10 minutes, then rotate the rolling pins and bake for another 10-15 minutes or until they're golden brown.
Step 11: Serving the Chimney Cakes
- Once they're baked to perfection, carefully slide the chimney cakes off the rolling pins and onto a serving plate. Serve them up while they're still warm and enjoy the sweet, crunchy goodness of your homemade treats!
Notes
- Lukewarm milk is essential for activating the yeast and aiding in the dough's rising process.
- Room temperature eggs are easier to incorporate into the dough, ensuring a smoother texture.
- Softened butter blends seamlessly into the dough, adding richness and moisture.
- Vanilla extract is optional but enhances the overall flavor profile of the Chimney Cake.
- Ground walnuts can be substituted with other nuts or omitted for nut-free variations.
Frequently Asked Questions:
1. Can I use active dry yeast instead of instant dry yeast?
While active dry yeast can be used as a substitute for instant dry yeast, it requires proofing in warm liquid before adding to the dough. Adjust the rising time accordingly.
2. How can I store leftover Chimney Cake?
Store any leftover Chimney Cake in an airtight container at room temperature for up to 2 days, or freeze individual portions for a longer shelf life.
3. Is it necessary to brush the dough with an egg wash?
Brushing the dough with an egg wash helps create a shiny and golden crust, but you can omit this step if desired.
4. Can I make Chimney Cake without nuts for allergies?
Absolutely! Simply omit the ground walnuts from the topping or substitute with seeds like sesame or poppy seeds for a nut-free version.
5. Can I substitute whole wheat flour for all-purpose flour?
While whole wheat flour can be used, the texture and flavor of the Chimney Cake may be slightly different. Adjust the liquid content as needed for the desired consistency.
6. What is the origin of Chimney Cake?
Chimney Cake, also known as Kürtőskalács, is a traditional Hungarian pastry that dates back to the early 19th century. It is commonly found at fairs and festivals in Central Europe.
Conclusion
The art of making Chimney Cake is a delightful journey that combines the simplicity of ingredients with the joy of baking. From mixing the dough to crafting the perfect topping, each step in the process adds to the overall experience of creating a delicious and memorable dessert.
Whether you stick to the classic recipe or experiment with unique variations, the Chimney Cake is sure to be a crowd-pleaser that leaves everyone craving for more.
So, gather your ingredients, roll up your sleeves, and embark on a culinary adventure with this irresistible treat that promises to satisfy your sweet tooth and warm your heart. Cheers to good food and great company!